TextView
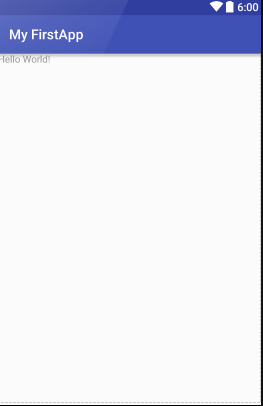
TextView 文本框,用于显示文本的控件,在前面helloWorld项目中也用到了该控件显示的基本效果如下:

其代码如下
<?xml version="1.0" encoding="utf-8"?>
<LinearLayout xmlns:android="http://schemas.android.com/apk/res/android"
    android:orientation="vertical"
    android:layout_width="fill_parent"
    android:layout_height="fill_parent"
    >
<TextView
    android:layout_width="fill_parent"
    android:layout_height="wrap_content"
    android:text="Hello World, MyActivity"
    />
</LinearLayout>
默认生成的TextView控件只用到了几个基本属性。TextView的常用属性:
-id: 为TextView设置一个组件id,根据id,我们可以在Java代码中获取到该对象,然后进行相关属性的设置
-layout_width: 组件宽度,一般有3种属性 wrap_content ,match_parent 和自己输入宽度
 wrap_content表示根据组件大小确定宽度即组件包含文字所占宽度越多,组件越宽;
 match_parent表示填满该组件的父容器即包含了该组件的组件如代码中的LinearLayout ;
-layout_hight: 组件高度,一般也有3种属性,同上;
-gravity: 设置控件中内容的对齐方向,即文字内容的对齐方向;
-text: 设置显示的文本内容(建议把字符串写到values/string.xml文件中,然后使用@String/xxx的方式获取 , 也可以直接写在""中);
-textColor: 设置文本的颜色(后面会附上常用颜色码);
-textStyle: 设置文本显示风格,三个可选属性 normal(无效果) ,bold(加粗) ,italic(斜体);
-background: 控件背景颜色,即填充整个控件的颜色;
在textview控件中引入string.xml中写好的文本的方法:
第一步:现在string.xml文件中加入你要显示的文本,并命名:
<?xml version="1.0" encoding="utf-8"?>
<resources>
    <string name="app_name">MyActivity</string>
    <string name="hello">hello ,你好</string>
</resources>
第二步:然后在控件中引入:
<TextView
    android:layout_width="fill_parent"
    android:layout_height="wrap_content"
    android:text="@string/hello"
    />
就是这么简单,实现国际化就要靠这个文件了(就是同名的文本内容换成其他语言)
常用颜色码:
-#ff0000 红
-#00ff00 绿
-#0000ff 蓝
有没有发现啥规律啊?(^o^)/
可以在网上找一些取色小软件,也很好用哦!
修改textView的文本的各种属性并运行看看效果吧!
本节就到这里啦!
